Warrior
Please help out Dragon Marked For Death Wiki by providing images for this article.
"The Warrior's Dragon Guard provides an [sic] steady barrier for his allies, but he can trade his defense for sheer attack power by activating Berserk.
While equipping an axe, the Warrior has access to skills to strengthen himself and benefits from an attacking style of managing distance from enemies while he charges his attacks.
With a great sword [sic] in hand, he can unleash powerful combination attacks to keep enemies in check.
Focus on raising the Warrior's HP and physical attack stats to keep him alive and healthy while battling foes."
The Warrior (戦士 Senshi, Warrior) is the 2nd of the 6 playable characters in Dragon Marked For Death. He bears the Dragon Scar in his chest, allowing him to manifest Atruum to summon an impenetrable shield and channel the dragon's rage.
The Warrior is a hard-hitting character focused on defense and one-hit-kill burst attacks. He's a good beginner character who can handle offense, defense, support, and recovery all at once without needing to play very fast. He can deal a gigantic amount of close-range damage on his own as well as provide direct support to his allies with his defensive abilities. He also has the unique ability to stun Bosses, incapacitating them for ~6 seconds.
Story
History

The Warrior grew up an orphan in the Dragonblood Clan orphanage and bears the Dragon Scar in his chest. The younger orphans looked up to him like an older brother, and he lived a self-sufficient life. While fishing in a nearby river, his brothers and sisters were slain by the Divine Knights.[1]
Character Voices
| Type | Voice Actor | English (Translation) | Japanese |
|---|---|---|---|
| A | Yuuichirou Umehara | Introduction: "We will crush our enemies. We will show no mercy." | Introduction: 「敵は叩き伏す、容赦はせん」 |
| Dragonsphere: "Ha! Turn to dust!!" | Dragonsphere: 「ハッ!塵芥となれ!」 | ||
| B | Junichi Suwabe | Introduction: "Don't worry, I’ll take care of the defenses!" | Introduction: 「安心しろ、防御は俺に任せておきな」 |
| Dragonsphere: "Hmph! Take it! Take my wrath!" | Dragonsphere: 「フンッ!受けとれ!俺の怒りを!」 | ||
| C | Yuichi Nakamura | Introduction: "Everyone, lend me your strength!" | Introduction: 「皆、俺に力を貸してくれ」 |
| Dragonsphere: "Oh! I'll protect you all!" | Dragonsphere: 「オォ!すべてを守ってみせる!!」 | ||
| D | Taku Yashiro | Introduction: "Alright, everyone, hide behind me!" | Introduction: 「よし皆、俺の影に隠れろ」 |
| Dragonsphere: "Bring it on! I'll give it my all!" | Dragonsphere: 「いくぞ!俺のすべてをかける!」 | ||
| E | Jeff Manning | - | - |
| F | Jeff Manning | - | - |
| G | Iain Gibb | - | - |
| H | Walter Roberts | - | - |
Inputs
This is a list of Warrior's inputs. To find the inputs set on your character, please go to the in-game Menu and select the Button Config option.
| Skill | Input(s) |
|---|---|
| Slash | Attack (Ground or Aerial) |
| Charged Slash | Hold Attack to charge, then release (Ground or Aerial) |
| Tackle | ↓ + Dash |
| Rising Slash ( |
↓ + Dash an enemy with a Greatsword equipped |
| Dragon Guard | Dragon Guard (Release to cancel) |
| Berserk | Berserk (Cancellable) |
| Dragon Tackle | (While Berserk)
↓ + Dash |
| Dragon Smash | (While Berserk)
Hold Attack to charge, then ↓ + release |
| Dragon's Rage | (While using Dragon Guard)
Guard against enemies, enemy attacks, or other "valid objects" (5x max) |
| War Cry | (While Berserk)
↓ + Berserk (Cancellable) |
Weapons
 Axes
Axes
"The Warrior's axe is focused on its slow but powerful charge attack.
In combination with the War Cry to power up his next attack, the Warrior should use hit-and-run tactics.
If an enemy should leave its defenses down, the Warrior can unleash the powerful Dragon Smash instead."
![]() Axes are available starting from Level 1. Axes focus on one-hit kills and have a longer charge time than Greatswords. Warrior also has a Tackle skill that allows him to move forward and lightly damage enemies he hits or break some objects during Quests. Axes have a slow attack speed, but are great for one-hitting enemies and have a more powerful War Cry than Greatswords.
Axes are available starting from Level 1. Axes focus on one-hit kills and have a longer charge time than Greatswords. Warrior also has a Tackle skill that allows him to move forward and lightly damage enemies he hits or break some objects during Quests. Axes have a slow attack speed, but are great for one-hitting enemies and have a more powerful War Cry than Greatswords.
 Greatswords
"The Warrior's great sword [sic] is capable of rushing down enemies with combo attacks.
Its single attack damage can't compare to the axe, but relentless attacks with the sword can match its damage output.
The sword generates DP easily, and its damage output during Berserk can outpace War Cry."
![]() Greatswords are available starting from Level 10. Greatswords focus on multi-hit kills and have a shorter charge time than Axes. Alongside the normal Tackle, Greatswords add a Rising Slash attack, which causes Warrior to slash and launch enemies upward after Tackling them. However, some enemies, such as Bosses and fixed enemies, cannot be juggled. Greatswords are good for earning DP due to their short charge time (Charged Slashes build up the most DP). They have a highly effective Berserk and Dragon's Rage. It's also faster to perform "Superjump" as a starting attack when using a Greatsword.
Greatswords are available starting from Level 10. Greatswords focus on multi-hit kills and have a shorter charge time than Axes. Alongside the normal Tackle, Greatswords add a Rising Slash attack, which causes Warrior to slash and launch enemies upward after Tackling them. However, some enemies, such as Bosses and fixed enemies, cannot be juggled. Greatswords are good for earning DP due to their short charge time (Charged Slashes build up the most DP). They have a highly effective Berserk and Dragon's Rage. It's also faster to perform "Superjump" as a starting attack when using a Greatsword.
Swapping Weapons
You can choose to equip 1 Axe and 1 Greatsword and swap between them during a Quest to have the benefit of both weapons.
If you are charging up with 1 weapon and then switch to another weapon of the same type (ex. an Axe to an Axe or a Greatsword to a Greatsword), then the charge time will be maintained. However, if you instead switch between different types (ex. an Axe to a Greatsword), then the charge time will be reset.
Hit!! Count Calculation
The following table shows the minimum amount of AGI over the enemy's AGI that you need for a higher Hit!! count and the damage multiplier for that Hit!! count.
| Weapon | Hit!! Count | AGI over Enemy AGI | Damage Multiplier |
|---|---|---|---|
| 2 Hit!! | 20 AGI | 1.5 | |
| 3 Hit!! | 40 AGI | 1.8 | |
| 2 Hit!! | 15 AGI | 1.5 | |
| 3 Hit!! | 30 AGI | 1.8 | |
| 4 Hit!! | 40 AGI | 2.03 |
Attack Values & Dragon Power (DP) Gain
The following table shows various attacks and their Motion Values and how much Dragon Power (DP) you can gain from them depending on the Weapon. 10 points = 1 segment.
| Attack | Motion Value | ||
|---|---|---|---|
| Ground Slash | 3.60 | 1.50 | 1.01 |
| Aerial Slash | 2.60 | 1.50 | 1.01 |
| Charged Slash 1 (Main Hitbox) | 5.60 | 10.00 | 6.75 |
| Charged Slash 2 (Main Hitbox) | 1.40 | 1.00 | 0.68 |
| Charged Slash Splash (Left and Right Shockwaves) | 1.00 | ‒ | ‒ |
| Tackle | 1.20 | 0.80 | 0.54 |
| Tackle 2 ( |
2.00 | ‒ | 1.07 |
| Tackle 3 ( |
2.80 | ‒ | 1.07 |
Basic Abilities
Slash
| Skill | Input(s) |
|---|---|
| Slash | Attack (Ground or Aerial) |
Slash is Warrior's main attack and it can be charged up to unleash stronger attacks. It deals Physical or Magical damage depending on the Weapon properties. Chaining grounded, aerial, and Charged Slashes can lead to powerful combos. Aerial Slashes deal slightly less damage than grounded Slashes.
Charged Slash
| Skill | Input(s) |
|---|---|
| Charged Slash | Hold Attack to charge, then release (Ground or Aerial) |
By pressing and holding then releasing the attack button, Warrior can perform a Charged Slash. The Charged Slash makes Warrior jump before landing and dealing burst damage. It deals Physical or Magical damage depending on the Weapon properties.
Charged Slashes have 4 hitboxes, and the combined power of all 4 is roughly 2x that of a ground slash. These 4 hitboxes are:
- The weapon itself
- The large main shockwave
- The smaller shockwaves that appear to the left and right when the downward swing touches the ground
The large main shockwave penetrates terrain, so you can hit enemies through walls. Keep this in mind when you start using War Cry.
Caution: Charging Lowers Movement Speed
Without charging, Warrior's movement speed is the same as Empress's, but while charging, his movement speed lowers to 92.5% relative to her. Essentially, holding in a charge causes Warrior's speed to lower by ~7.5%.
Jumping Charged Slash
When performing a Charged Slash on the ground, Warrior automatically makes a small jump before landing and attacking. Unlike normal slashes, the Charged Slash damage does not decrease when released in midair. When using a Charged Slash in midair, Warrior attacks immediately. Because of this, it's faster to release a Charged Slash by manually jumping and then releasing the attack (see the video above).
Tackle
| Skill | Input(s) |
|---|---|
| Tackle | ↓ + Dash |
Tackle is a grounded-only attack that launches Warrior a brief distance after a short start-up time. It has low attack power, but can be used to destroy specific obstacles. It deals Physical or Magical damage depending on the Weapon properties. Although the power is low, it resists ~80% of damage taken if you perform it while getting hit.
It can be used to affect obstacles that no other playable character can affect by:
- Pushing boxes, trolleys, and blocks
- Destroying dead trees
Tackle is also used to perform "Superjump", which is when a grounded Charged Slash is performed immediately after a Tackle, launching Warrior across great distances.
Rising Slash (Greatsword Only)
| Skill | Input(s) |
|---|---|
| Rising Slash ( |
↓ + Dash an enemy with a Greatsword equipped |
Rising Slash is a grounded-only, ![]() Greatsword-exclusive attack that is an add-on to the Tackle. Rising Slash causes Warrior to launch enemies upward when a Tackle successfully hits an enemy. It deals Physical or Magical damage depending on the Weapon properties. The Greatsword's ability to juggle enemies in the air with Rising Slash compensates for Tackle's low attack power, so it can be a good starting attack for performing aerial combos. Not all enemies can be juggled, but most common enemies can.
Greatsword-exclusive attack that is an add-on to the Tackle. Rising Slash causes Warrior to launch enemies upward when a Tackle successfully hits an enemy. It deals Physical or Magical damage depending on the Weapon properties. The Greatsword's ability to juggle enemies in the air with Rising Slash compensates for Tackle's low attack power, so it can be a good starting attack for performing aerial combos. Not all enemies can be juggled, but most common enemies can.
Example Combos & Techniques
Axe Combos
Axe Charged Slash Combo
| Combo | Input(s) |
|---|---|
| Charge → Jump → Charged Slash → Aerial Slash → Ground Slash → Tackle | Hold Attack → Jump → Release Attack → Jump + Attack → Land + Attack → ↓ + Dash |
This Axe Charged Slash combo is good for finishing off enemies without needing to retreat and charge up a second Charged Slash. This combo works because you can chain Charged Slash, Aerial Slash, Ground Slash, and Tackle in quick succession. You can perform this combo faster if you are able to jump quickly (as if you are barely leaving the ground).
Greatsword Combos
Greatsword Charged Slash Combo
| Combo | Input(s) |
|---|---|
| Charge → Jump → Charged Slash → Aerial Slash → Ground Slash → Tackle (Rising Slash) | Hold Attack → Jump → Release Attack → Jump + Attack → Land + Attack → ↓ + Dash |
This Greatsword Charged Slash combo is a faster version of the equivalent Axe combo. By the time you complete the Rising Slash, your charge-up will be complete. Because of this, you can chain into Charged Slash more quickly with a Greatsword than with an Axe.
Greatsword Rushdown Combo
| Combo | Input(s) |
|---|---|
| Aerial Slash → Ground Slash → Tackle (Rising Slash) | Jump + Attack → Land + Attack → ↓ + Dash |
This Greatsword Rushdown combo juggles enemies and constantly flinches them, preventing them from fighting back. Basically, it's an alternate version of the basic combo but without the Charged Slash. Holding in a charge lowers your speed by ~7.5%, so you can do this combo if you don't have a charge ready or don't want to charge up.
Superjump
| Combo | Input(s) |
|---|---|
| Charge → Tackle + Charged Slash | Hold Attack → ↓ + Dash + Release Attack |
"Superjump" is a technique that horizontally launches Warrior a great distance. It can be used to reach areas that Warrior can't obviously reach, to start attacks for combos, and to bypass enemy hitboxes without flinching. You still have a lot of maneuverability mid-launch, so you can reposition yourself if you overshoot.
With Berserk
Since it's harder and more DP-costly to perform Superjump with Berserk, it's best to use this technique without Berserk if you're trying to go fast. However, in some cases (such as ![]() Fire Warrior's charged Dragon Tackle), Berserk can help increase Superjump's distance.
Fire Warrior's charged Dragon Tackle), Berserk can help increase Superjump's distance.
Dragon Skills
"The Warrior's Dragon Tackle is capable of stunning enemies and keeping them under control. The Dragon Smash can deal immense damage.[a]" ―
Game Tips
Dragon Guard
| Skill | Input(s) |
|---|---|
| Dragon Guard | Dragon Guard |
Dragon Guard is a defensive forcefield that blocks all enemy attacks and gradually heals the Health Points (HP) of all allies within it, including yourself. It consumes DP and creates a circular barrier around Warrior. Dragon Guard can be activated only when grounded, and it disables Berserk if it is currently active. Dragon Guard is also used for building up Dragon's Rage: the more the barrier gets hit, the more Dragon's Rage you build up.
Dragon Guard causes most enemies and certain Boss attacks to recoil. For example, guarding the Ogre Prince's overhead smash attack causes him to throw his arm back. If you are inside the guarded area, you will be completely protected from incoming attacks, even if the enemy's hitbox does not get deflected by the barrier. Dragon Guard can also immediately destroy explosive enemies, such as The Sea Lord's Executioner's Bomb Servants.
Caution: If the Enemy's Hitbox is "Inside" the Barrier
Although the barrier itself is invincible, if the enemy's hitbox is "inside" the barrier, once the Dragon Guard expires, you will get hit. Be mindful of how much DP you have left.
When trying to use Dragon Guard in lava, poison water, etc., Warrior will flinch and Dragon Guard will be deactivated. However, Dragon Guard can be sustained by using equipment with the "Super Armor" effect.
Healing Effect
The HP heal per tick for Dragon Guard can be increased with PIE:
HP Recovery = (Warrior's PIE + Target's VIT) * 0.25
The rate of healing depends on the Dragon Contract.
Berserk
| Skill | Input(s) |
|---|---|
| Berserk | Berserk (Cancellable) |
Berserk boosts Warrior's attack power at the cost of his defense. Upon activation, a pink aura surrounds his body, increasing his attack power. DP is consumed over time while Berserk. Berserk can be activated only while grounded.
Berserk will be disabled in the following situations:
- The Berserk button is pressed again
- Dragon Guard is activated
- The DP gauge is depleted
Lowered Defense
Berserk lowers Warrior's defense. Specifically, the amount of damage you take from enemy Magical and Holy attacks is 2x.[2] However, your damage taken for Physical attacks can vary. Also, if you're inflicted with ![]() Burn, enemy attack power increases by 1.5x. This means that if you have
Burn, enemy attack power increases by 1.5x. This means that if you have ![]() Burn and Berserk, the total damage you take is roughly 3x or more.
Burn and Berserk, the total damage you take is roughly 3x or more.
Dragon Tackle
| Skill | Input(s) |
|---|---|
| Dragon Tackle | (While Berserk)
↓ + Dash |
While Berserk, Warrior's Tackle becomes a shield bash called Dragon Tackle. Performing a Dragon Tackle causes Warrior to launch himself forward after holding up a shield (indicated by his animation). Dragon Tackle deals Holy damage. You can stun Bosses with this attack.
For ![]() Axes, hitting an enemy with the Dragon Tackle will cause Warrior to rebound. "Rebound" refers to Warrior bouncing backwards on impact. For
Axes, hitting an enemy with the Dragon Tackle will cause Warrior to rebound. "Rebound" refers to Warrior bouncing backwards on impact. For ![]() Greatswords, upon successfully hitting an enemy, the Dragon Tackle automatically continues into a Rising Slash that deals Physical damage. The Rising Slash keeps him on the ground. You can take advantage of these differences to form combos with Dragon Tackle.
Greatswords, upon successfully hitting an enemy, the Dragon Tackle automatically continues into a Rising Slash that deals Physical damage. The Rising Slash keeps him on the ground. You can take advantage of these differences to form combos with Dragon Tackle.
Defensive Benefits
Similar to Tackle's defensive capabilities, performing Dragon Tackle can benefit Warrior's defense:
- During Berserk: reduces damage taken by ~89%.
- During Dragon's Rage: reduces damage taken by ~80%.
Damage Calculation
You can increase your damage by increasing your PIE:
Dragon Tackle Damage = PIE * Dragon Contract's Dragon Tackle Motion Value
Dragon Smash
| Skill | Buttons |
|---|---|
| Dragon Smash | (While Berserk)
Hold Attack to charge, then ↓ + release |
While Berserk, Warrior can perform a a special charged attack called Dragon Smash. In a Dragon Smash, Warrior unleashes an upward shockwave after an initial swinging motion. The attack deals Holy damage. You can stun Bosses with this attack.
Dragon Smash has 2 main hitboxes:
- The axehead itself (AKA the "base")
- A huge laser pillar (AKA the Area of Effect ("AoE") attack or the "laser")
Dragon Smash always penetrates terrain, so you can attack enemies from below with the giant laser.
Damage Calculation
You can increase your damage by increasing your PIE:
Dragon Smash Damage = PIE * Contract's Dragon Smash Motion Value
Stunning Bosses
Exclusive to Warrior, when using Dragon Tackle or Dragon Smash on a Boss that is flashing red, the Boss will be stunned for ~6 seconds. Some Bosses cannot be stunned. Attack damage has no impact on stunning bosses. As long as you hit the boss with Dragon Tackle or Dragon Smash at the right time, the boss will be stunned.
The following table contains a list of Bosses and their stun timing windows.
| Boss | Stun Timing Window |
|---|---|
| Equus ( |
The short moment between braking and performing a back kick |
| Equus ( |
While braking after the rush attack |
| The Trampling Lance | |
| The Tempest Steed | |
| Ogre Prince | Before throwing down the club |
| Jinryu | |
| The Demon's Puppet | |
| The Horn Breaker | |
| Mandrake | After the shockwave attack on the large main body |
| Cthulhu | Far left and far right: before shooting the water laser Middle left and middle right: before shooting |
| Sumahiko | Before the headbutt attack |
| Asura Dragon | When rising from the ground before the large breath attack |
| The Ancient Primal Lord | |
| Tonitrus | After a contact-damage rush attack to the ground |
| Vasith | Before initiating the afterimages tackle |
| Lycanthrope | Highly randomized: sometimes right after the invulnerable full-screen claw slash attack, sometimes right before the lunging afterimages attack, sometimes right before the rock throw attack |
| Bandit (Rivalis) | Not a true stun, but has beneficial effects: stun Rivalis while they are holding a healing item to drop the healing item and take it for yourself |
| Main Scenario Final Boss (1st Form) | Before the pink body flame attack |
| DLC Scenario Final Boss | While in |
Example Dragon Skill Combos & Techniques
Dragon Tackle Chain Combos
You can chain Dragon Tackle into Charged Slash or Dragon Smash.
With Axes
| Combo | Input(s) |
|---|---|
| Charge → Dragon Tackle → (Hit enemy) → (Wait until Tackle rebound starts) → Charged Slash | Hold Attack → ↓ + Dash → (Hit enemy) → (Wait until Tackle rebound starts) → Release Attack |
| Charge → Dragon Tackle → (Hit enemy) → (Wait until Tackle rebound ends) → Dragon Smash | Hold Attack → Dragon Tackle → (Hit enemy) → (Wait until Tackle rebound ends) → ↓ + Release Attack |
For ![]() Axes, to chain Dragon Tackle into Charged Slash and Dragon Smash, you'll need to wait for the rebound that occurs when you hit an enemy with the Dragon Tackle. The "rebound" refers to Warrior bouncing backwards upon hitting an enemy. Once you start rebounding into the air, you can release the Charged Slash. For the Dragon Smash, however, you'll need to wait until Warrior touches the ground again at the end of the rebound because you can only perform a Dragon Smash on the ground.
Axes, to chain Dragon Tackle into Charged Slash and Dragon Smash, you'll need to wait for the rebound that occurs when you hit an enemy with the Dragon Tackle. The "rebound" refers to Warrior bouncing backwards upon hitting an enemy. Once you start rebounding into the air, you can release the Charged Slash. For the Dragon Smash, however, you'll need to wait until Warrior touches the ground again at the end of the rebound because you can only perform a Dragon Smash on the ground.
With Greatswords
| Combo | Input(s) |
|---|---|
| Charge → Dragon Tackle → (Hit enemy) → (Wait until Rising Slash starts) → Charged Slash | Hold Attack → ↓ + Dash → (Hit enemy) → (Wait until Rising Slash starts) → Release Attack |
| Charge → Dragon Tackle → (Hit enemy) → (Wait until Rising Slash starts) → Dragon Smash | Hold Attack → Dragon Tackle → (Hit enemy) → (Wait until Rising Slash starts) → ↓ + Release Attack |
For ![]() Greatswords, you can chain Dragon Tackle into Charged Slash and Dragon Smash faster because you only need to wait until the very start of the Rising Slash animation to unleash either of them. This is because Greatsword Dragon Tackle has no rebound period. Instead, the Dragon Tackle goes directly into Rising Slash, which keeps Warrior planted on the ground. Because you are on the ground the entire time, you can unleash Charged Slash or Dragon Smash right away.
Greatswords, you can chain Dragon Tackle into Charged Slash and Dragon Smash faster because you only need to wait until the very start of the Rising Slash animation to unleash either of them. This is because Greatsword Dragon Tackle has no rebound period. Instead, the Dragon Tackle goes directly into Rising Slash, which keeps Warrior planted on the ground. Because you are on the ground the entire time, you can unleash Charged Slash or Dragon Smash right away.
Advanced Dragon Skills
Dragon's Rage
| Skill | Input(s) |
|---|---|
| Dragon's Rage | (While using Dragon Guard)
Guard against enemies, enemy attacks, or other "valid objects" (5x max) |
Dragon's Rage (AKA "Revenge") is a special variant of Berserk that builds up when enemies and attacks hit Warrior's Dragon Guard. It is signified by a glowing blue silhouette radiating from Warrior.
Advantages over Berserk
Unlike Berserk, Dragon's Rage:
- Does not deplete DP
- Does not deactivate when entering a Boss gate
- Does not have the side-effect of lowered defense
Dragon's Rage Levels
Dragon's Rage comes with 1-4 levels, which indicate how much Rage has been stored up. These levels increment the more times Dragon Guard gets hit. Typically, building up Dragon's Rage is a side-effect of blocking an attack. Once you successfully block valid objects 5 times before Rage expires, Dragon's Rage will be at its maximum level, which will allow Warrior to use Dragon Tackle and Dragon Smash without Berserk. The duration of Dragon's Rage replenishes even if you block just 1 attack or valid object, so if you think your Rage is about to run out, find something to guard against quickly.
"Valid Object" Collisions that Build Up Dragon's Rage
Enemy attacks are not the only things that can build up Dragon's Rage. Dragon's Rage can build up when the Dragon Guard collides with the following "valid objects":
- Enemy hitboxes (ex. the body of a Tough Chick)
- Enemy attacks (ex. each ball of the Ogre Prince's fire breath attack)
- Level objects (ex. wooden spikes, bamboo spikes, flamethrowers, etc.)
- Item Pickups (ex.
 food,
food,  old coins,
  herbs,
  money, etc.)
Damage Multiplier Calculation
Final Damage Multiplier = Collisions Blocked * 0.20 * Contract's Berserk Damage Multiplier
For example, since the damage multiplier for ![]() Ice Warrior's Berserk is 80%, then 1 collision * 0.20 * 0.80 = 0.16 = +16% damage boost.
Ice Warrior's Berserk is 80%, then 1 collision * 0.20 * 0.80 = 0.16 = +16% damage boost.
After guarding valid objects for 5 collisions, the damage multiplier will be the same as that of your Dragon Contract's normal Berserk. For example, since the damage multiplier for ![]() Ice Warrior's Berserk is 80%, then 5 collisions * 0.20 * 0.80 = 80% = +80% damage boost.
Ice Warrior's Berserk is 80%, then 5 collisions * 0.20 * 0.80 = 80% = +80% damage boost.
War Cry
| Skill | Input(s) |
|---|---|
| War Cry | (While Berserk)
↓ + Berserk |
While Berserk or under Dragon's Rage, Warrior can activate War Cry, in which he consumes more DP to make his very next attack become even more powerful. It is signified by a glowing orange silhouette radiating from him. War Cry increases the damage of all attacks, including Dragon Skills.[b] As long as DP is available, War Cry can be activated as many times as wanted during a single Berserk activation.
Damage Boost Conditions
Only the immediate next attack is modified by War Cry[c], including regular Slash attacks, so be careful not to waste a shot. War Cry should generally be applied to your most powerful attacks, such as the Charged Slash, Dragon Tackle, and Dragon Smash. Also, it increases the size of the Charged Slash extremely, making it useful for quickly hitting airborne enemies and enemies through walls. Depending on the equipment, activating War Cry can increase damage into the tens of thousands, even with Magic weapons.
Physical attacks tend to have a higher damage multiplier than Holy attacks, but this is not always the case.
Advantage of War Cry from Dragon's Rage
War Cry can be used while in Dragon's Rage. Using Dragon's Rage War Cry has several benefits over normal Berserk's War Cry:
- It does not get disabled while using Dragon Guard (see the video above).
- It does not gradually drain your DP while it is active. However, it still uses some amount of DP when initially activated.
These advantages are especially useful for ![]() Poison Warrior because it's easy to get Dragon's Rage activated and it also lasts for a longer time compared to other Contracts (~15 seconds).
Poison Warrior because it's easy to get Dragon's Rage activated and it also lasts for a longer time compared to other Contracts (~15 seconds).
Dragon Contracts
Warrior's playstyle changes significantly based on the selected Contract. Because Warrior's Dragon Skills affect his other attacks and mobility so closely, please carefully choose the Contract to suit your build.
 Ice Contract
"Actions are slower, high power." ― Atruum's Den
"
Berserk greatly increases his attack power and allows his Smash to give enemies
Frostbite. Along with its high base damage, and bonus damage when hitting in its sweet spot[d], the Smash is the center of his arsenal."
![]() Ice Contract is Warrior's default Contract. It emphasizes guarding and can work well with both normal attacks and Dragon Skills. However, Dragon Skill activation is a little slow.
Ice Contract is Warrior's default Contract. It emphasizes guarding and can work well with both normal attacks and Dragon Skills. However, Dragon Skill activation is a little slow.
Dragon Guard is DP-efficient and has the longest-lasting total duration.
While in Berserk, you'll have 0% DP recovery with an ![]() Axe and 50% DP recovery with a
Axe and 50% DP recovery with a ![]() Greatsword. However, since Berserk lasts long, it won't be a problem if you can manage it well.
Greatsword. However, since Berserk lasts long, it won't be a problem if you can manage it well.
Dragon Smash is a diagonal upward laser attack. The axehead's hitbox deals more damage than the laser's hitbox, so it's best to use this attack when you're close to the enemy.
 Thunder Contract
"Actions are faster, low power." ― Atruum's Den
"
His Berserk doesn't increase his attack much, but consumes little DP. He's best suited to fighting with his Dragon Skills.
His Dragon Smash does more damage in the wave[e] instead of the base[f], making it suited for anti-air."
![]() Thunder Contract is Warrior's second available Contract, added in Version 2.0.0. It emphasizes speed and is more Dragon Skill-oriented compared to
Thunder Contract is Warrior's second available Contract, added in Version 2.0.0. It emphasizes speed and is more Dragon Skill-oriented compared to ![]() Ice Warrior. Dragon Skill activation is also faster than
Ice Warrior. Dragon Skill activation is also faster than ![]() Ice Warrior's.
Ice Warrior's.
![]() Thunder Warrior has the longest Berserk duration.
Thunder Warrior has the longest Berserk duration.
Dragon Tackle can be quickly activated to stun Bosses.
Dragon Smash has the same appearance as ![]() Ice Warrior's Dragon Smash as a diagonal upward laser attack. However, the AoE laser's hitbox deals more damage than the axehead's hitbox. Because of this, it's best to use this attack when far from the enemy and if the enemy is positioned diagonally above you so that the laser will land.
Ice Warrior's Dragon Smash as a diagonal upward laser attack. However, the AoE laser's hitbox deals more damage than the axehead's hitbox. Because of this, it's best to use this attack when far from the enemy and if the enemy is positioned diagonally above you so that the laser will land.
 Fire Contract
"Tackle is strengthened and can be charged." ― Atruum's Den
"
However, his Berserk damage is low[g], his Guard range is small, and his Smash damage is reduced. In addition, his DP consumption [is] extremely high overall."
![]() Fire Contract is Warrior's third available Contract, added in Version 2.1.0. It is a more DP-efficient Contract than others and has a specialized Dragon Tackle that can be charged up.
Fire Contract is Warrior's third available Contract, added in Version 2.1.0. It is a more DP-efficient Contract than others and has a specialized Dragon Tackle that can be charged up.
The radius of Dragon Guard is the smallest of all Contracts.
Dragon Smash sends out 4 pillars of fire flying in a horizontal line. It has a wide range, but the total power is low, so it's mainly used for Common Enemy crowd control.
The damage boost of War Cry is the highest of all Contracts.
Fire Dragon Tackle
By holding down the Dragon Tackle command, the DP gauge begins ticking down, and the DP consumption, Dragon Skill power, and Dragon Tackle range increase level by level. You can release the Dragon Tackle at any time you want, or you can make it charge up until the maximum level (indicated by a sharp sound effect and a glowing orange aura around Warrior). You can also perform a very far-reaching Superjump by using the maximum Dragon Tackle level.
| Charge Level | DP Consumption per Level | Motion Value Formula | Charge Time |
|---|---|---|---|
| None | 0.5 segments | PIE * 15.60 | ‒ |
| Halfway | 1.0 segments | PIE * 35.09 | +0.5 seconds |
| Maximum | 2.5 segments | PIE * 110.50 | +1.5 seconds |
 Wind Contract
"Specialized in the Dragon Smash and DP generation." ― Atruum's Den
"
His Berserk and Guard have low performance. Activating Berserk consumes DP, but in exchange DP generation during Berserk is increased.
Maintain a Berserk state, gain DP with the Dragon Tackle and let the Dragon Smashes fly."
![]() Wind Contract is Warrior's fourth available Contract, added in Version 2.2.0. It has a high emphasis on Dragon Skill-focused builds, able to quickly generate DP to unleash a powerful Dragon Smash.
Wind Contract is Warrior's fourth available Contract, added in Version 2.2.0. It has a high emphasis on Dragon Skill-focused builds, able to quickly generate DP to unleash a powerful Dragon Smash.
Dragon Guard duration is short and costs 2 DP segments, but by having a high amount of PIE, you can still heal by a lot in a short time.
Activating Berserk costs 2 DP segments. However, attacking while Berserk has 150% DP recovery, meaning that you'll build up more DP while Berserk than not.
Dragon Tackle is the fastest of all Contracts and consumes 0 DP, making it very easy to use for stunning Bosses, but it has a very short range and deals only a small amount of damage. You can launch multiple Dragon Tackles at once without worrying about DP cost.
Dragon Smash creates a giant tornado in front of Warrior. Both the axehead hitbox and the AoE tornado laser hitbox carry a high amount of damage with huge range that deals multiple hits. ![]() Wind Warrior's Dragon Smash consumes a lot of DP and its startup time is slow, taking about the same amount of time as
Wind Warrior's Dragon Smash consumes a lot of DP and its startup time is slow, taking about the same amount of time as ![]() Ice Warrior's Dragon Smash.
Ice Warrior's Dragon Smash.
Infinite War Cry with Greatswords
| Combo | Input(s) |
|---|---|
| Dragon Tackle (Rising Slash) → Ground Slash → repeat | ↓ + Dash → Attack → repeat |
| Charge → Dragon Tackle (Rising Slash) → Charged Slash → repeat | Hold Attack → ↓ + Dash → Release Attack → repeat |
| Charge → Dragon Tackle (Rising Slash) → Dragon Smash → repeat | Hold Attack → ↓ + Dash → ↓ + Release Attack → repeat |
![]() Wind Warrior's War Cry can last infinitely by taking advantage of Rising Slash. Basically,
Wind Warrior's War Cry can last infinitely by taking advantage of Rising Slash. Basically, ![]() Wind Warrior's
Wind Warrior's ![]() Greatsword Dragon Tackle comes out so fast that you can chain any ground attack (i.e. Ground Slash, Charged Slash (from the ground), Dragon Tackle and Dragon Smash) into it without ending War Cry.[3]
Greatsword Dragon Tackle comes out so fast that you can chain any ground attack (i.e. Ground Slash, Charged Slash (from the ground), Dragon Tackle and Dragon Smash) into it without ending War Cry.[3]
 Poison Contract
"Specialized Berserk and Dragon's Rage." ― Atruum's Den
"
His Berserk consumes DP extremely quickly, but his Dragon's Rage lasts a long time, and his Dragon Guard will grant him a Berserk state at low DP cost when blocking enemy attacks.
During Dragon's Rage, he won't generate DP, but connecting with a Smash will recover DP greatly."
![]() Poison Contract is Warrior's fifth available Contract, added in Version 2.3.0. It is highly specialized in Physical attacks and tends to be a Contract for experimental builds that rely on Dragon Guard due to its focus on maintaining Dragon's Rage.
Poison Contract is Warrior's fifth available Contract, added in Version 2.3.0. It is highly specialized in Physical attacks and tends to be a Contract for experimental builds that rely on Dragon Guard due to its focus on maintaining Dragon's Rage.
Dragon Guard's radius is the largest of all Contracts. The large radius makes it easier to hit objects to build up Dragon's Rage. However, it drains DP the fastest of all Contracts, lasting for 3.30 seconds maximum at a full DP bar. Like ![]() Ice Contract,
Ice Contract, ![]() Poison Contract's initial Dragon Guard activation costs 1 DP, the cheapest.
Poison Contract's initial Dragon Guard activation costs 1 DP, the cheapest.
Dragon Tackle consumes 0 DP, thus it can be performed multiple times in a row without worrying about DP cost. It's easy to time the Dragon Tackle for stunning Bosses.
Poison Dragon Smash
Dragon Smash transforms Warrior's Weapon into a tall axe that releases poisonous bubbles in front of him. Dragon Smash costs 0 DP to activate, and upon a successful hit, Warrior recovers DP depending on the Weapon used:
- Axes give 1.5-3 segments and each teammate gains 1.5 segments.
- Greatswords give 4.5-5 segments and each teammate gains 2 segments.
Each enemy the Dragon Smash hits multiplies your DP gain. For example, if you hit 2 enemies at the same time with 1 Dragon Smash using a ![]() Greatsword, you’ll gain ~10 segments of DP total (in addition to the DP gained from killing the enemies). Due to the lack of DP cost and the high DP gain, Dragon Smash is extremely effective in regaining DP, evening out the near-0 DP recovery while Berserk or Dragon’s Rage is active. Damage-wise, however, Warrior’s Dragon Smash is slow and has poor damage and range, so it is not recommended to use a PIE-oriented build for this Contract.
Greatsword, you’ll gain ~10 segments of DP total (in addition to the DP gained from killing the enemies). Due to the lack of DP cost and the high DP gain, Dragon Smash is extremely effective in regaining DP, evening out the near-0 DP recovery while Berserk or Dragon’s Rage is active. Damage-wise, however, Warrior’s Dragon Smash is slow and has poor damage and range, so it is not recommended to use a PIE-oriented build for this Contract.
Poison Dragon's Rage
Dragon's Rage can last for 15 seconds and its boost damage is +100%, the highest of all Contracts. By tapping the Dragon Guard button instead of pressing and holding it, you can reach the maximum criteria for Dragon's Rage more efficiently without consuming too much DP. Unlike Dragon's Rage, however, Berserk has a short duration and consumes 1 DP segment to activate. While Berserk or under the effect of Dragon's Rage, there is 0 DP recovery except for the natural 2 segments of DP recovery and the DP gained from killing enemies. However, you can recover a lot of DP by hitting enemies with Dragon Smash.
Differences Between Contracts per Ability
The following charts show specific data for the differences between each Contract.[4]
Dragon Guard Contract Differences
| Contract | Initial DP Cost | DP Consumption per Second | Max. Duration at Full DP | Radius |
|---|---|---|---|---|
| 1 segment | 1.6 segments | 5.60 sec. | 2 - Normal | |
| 2 segments | 1.6 segments | 5.00 sec. | 2 - Normal | |
| 1.5 segments | 1.6 segments | 5.30 sec. | 0 - Smallest | |
| 2 segments | 2.1 segments | 3.75 sec. | 1 - Small | |
| 1 segment | 2.7 segments | 3.30 sec. | 3 - Large |
Berserk & Dragon's Rage Contract Differences
| Contract | Damage Bonus | Max. Duration at Full DP | DP Generation Bonus | Dragon's Rage Boost Time |
|---|---|---|---|---|
| +80% | 83.3 sec. | 0% (Axe) | 6.5 sec. | |
| 50% (Greatsword) | ||||
| +40% | 166.6 sec. | 0% (Axe) | 4.0 sec. | |
| 50% (Greatsword) | ||||
| +50% | 55.5 sec. | 50% (Axe) | 4.0 sec. | |
| 100% (Greatsword) | ||||
| +50% | 33.2 sec. | 100% (Axe) | 5.0 sec. | |
| 150% (Greatsword) | ||||
| +100% | 12.4 sec. | 0% (Axe) | 15.0 sec. | |
| 5% (Greatsword) |
War Cry Contract Differences
| Contract | Initial DP Cost | Physical Multiplier | Holy Multiplier |
|---|---|---|---|
| 2 segments | 4.20 (Axe) | 2.40 (Axe) | |
| 1.53 (Greatsword) | 2.28 (Greatsword) | ||
| 1.5 segments | 4.56 (Axe) | 3.28 (Axe) | |
| 1.60 (Greatsword) | 2.88 (Greatsword) | ||
| 2 segments | 5.40 (Axe) | 2.16 (Axe) | |
| 1.80 (Greatsword) | 2.04 (Greatsword) | ||
| 1.5 segments | 4.44 (Axe) | 1.92 (Axe) | |
| 1.57 (Greatsword) | 2.04 (Greatsword) | ||
| 2.5 segments | 2.91 (Axe) | 6.96 (Axe) | |
| 1.265 (Greatsword) | 6.60 (Greatsword) |
Dragon Tackle Contract Differences
| Contract | Initial DP Cost | Motion Value Formula | Startup Time |
|---|---|---|---|
| 1 segment | PIE * 25.5 | 0.50 sec. | |
| 1 segment | PIE * 24 | 0.30 sec. | |
| 0.5 segment | PIE * 15.6 | 0.35 sec. | |
| 0 segments | PIE * 6.3 | 0.15 sec. | |
| 0 segments | PIE * 5.7 | 0.25 sec. |
Dragon Smash Contract Differences
| Contract | Initial DP Cost | Axehead (Base) Motion Value Formula | Laser (AoE) Motion Value Formula | Laser (AoE) Hits | Max. Hits Damage Formula | Startup Time |
|---|---|---|---|---|---|---|
| 2 segments | PIE * 85 | PIE * 0.5 | 7 hits | PIE * 88.5 | 1.58 sec. | |
| 1.5 segments | PIE * 6.06 | PIE * 7.5 | 7 hits | PIE * 58.56 | 1 sec. | |
| 1 segment | PIE * 31.98 | PIE * 0.15 | 4 lasers * 5 hits | PIE * 34.98 | 1 sec. | |
| 2.5 segments | PIE * 90 | PIE * 3.5 | 12 hits | PIE * 132 | 1.58 sec. | |
| 0 segments | PIE * 19 | PIE * 0.1 | [Depends] | PIE * 19 | 1.38 sec. |
Example Builds
Status Calculation
Final Status = Base Status + (Growth Rate * Level) + Equipment Status
The following tables show Warrior's Growth Rates and Base Status values per Level.
| Warrior | STR | AGI | INT | VIT | LUC | PIE |
|---|---|---|---|---|---|---|
| Growth Rate | 30% | 10% | 20% | 40% | 20% | 30% |
| Lv | STR | AGI | INT | VIT | LUC | PIE |
|---|---|---|---|---|---|---|
| 1 | 6 | 3 | 4 | 7 | 5 | 5 |
| 2 | 6 | 3 | 4 | 7 | 5 | 5 |
| 3 | 6 | 3 | 4 | 8 | 5 | 5 |
| 4 | 7 | 3 | 4 | 8 | 5 | 6 |
| 5 | 7 | 3 | 5 | 9 | 6 | 6 |
| 6 | 7 | 3 | 5 | 9 | 6 | 6 |
| 7 | 8 | 3 | 5 | 9 | 6 | 7 |
| 8 | 8 | 3 | 5 | 10 | 6 | 7 |
| 9 | 8 | 3 | 5 | 10 | 6 | 7 |
| 10 | 9 | 4 | 6 | 11 | 7 | 8 |
| 11 | 9 | 4 | 6 | 11 | 7 | 8 |
| 12 | 9 | 4 | 6 | 11 | 7 | 8 |
| 13 | 9 | 4 | 6 | 12 | 7 | 8 |
| 14 | 10 | 4 | 6 | 12 | 7 | 9 |
| 15 | 10 | 4 | 7 | 13 | 8 | 9 |
| 16 | 10 | 4 | 7 | 13 | 8 | 9 |
| 17 | 11 | 4 | 7 | 13 | 8 | 10 |
| 18 | 11 | 4 | 7 | 14 | 8 | 10 |
| 19 | 11 | 4 | 7 | 14 | 8 | 10 |
| 20 | 12 | 5 | 8 | 15 | 9 | 11 |
| 21 | 12 | 5 | 8 | 15 | 9 | 11 |
| 22 | 12 | 5 | 8 | 15 | 9 | 11 |
| 23 | 12 | 5 | 8 | 16 | 9 | 11 |
| 24 | 13 | 5 | 8 | 16 | 9 | 12 |
| 25 | 13 | 5 | 9 | 17 | 10 | 12 |
| 26 | 13 | 5 | 9 | 17 | 10 | 12 |
| 27 | 14 | 5 | 9 | 17 | 10 | 13 |
| 28 | 14 | 5 | 9 | 18 | 10 | 13 |
| 29 | 14 | 5 | 9 | 18 | 10 | 13 |
| 30 | 15 | 6 | 10 | 19 | 11 | 14 |
| 31 | 15 | 6 | 10 | 19 | 11 | 14 |
| 32 | 15 | 6 | 10 | 19 | 11 | 14 |
| 33 | 15 | 6 | 10 | 20 | 11 | 14 |
| 34 | 16 | 6 | 10 | 20 | 11 | 15 |
| 35 | 16 | 6 | 11 | 21 | 12 | 15 |
| 36 | 16 | 6 | 11 | 21 | 12 | 15 |
| 37 | 17 | 6 | 11 | 21 | 12 | 16 |
| 38 | 17 | 6 | 11 | 22 | 12 | 16 |
| 39 | 17 | 6 | 11 | 22 | 12 | 16 |
| 40 | 18 | 7 | 12 | 23 | 13 | 17 |
| 41 | 18 | 7 | 12 | 23 | 13 | 17 |
| 42 | 18 | 7 | 12 | 23 | 13 | 17 |
| 43 | 18 | 7 | 12 | 24 | 13 | 17 |
| 44 | 19 | 7 | 12 | 24 | 13 | 18 |
| 45 | 19 | 7 | 13 | 25 | 14 | 18 |
| 46 | 19 | 7 | 13 | 25 | 14 | 18 |
| 47 | 20 | 7 | 13 | 25 | 14 | 19 |
| 48 | 20 | 7 | 13 | 26 | 14 | 19 |
| 49 | 20 | 7 | 13 | 26 | 14 | 19 |
| 50 | 21 | 8 | 14 | 27 | 15 | 20 |
| 51 | 21 | 8 | 14 | 27 | 15 | 20 |
| 52 | 21 | 8 | 14 | 27 | 15 | 20 |
| 53 | 21 | 8 | 14 | 28 | 15 | 20 |
| 54 | 22 | 8 | 14 | 28 | 15 | 21 |
| 55 | 22 | 8 | 15 | 29 | 16 | 21 |
| 56 | 22 | 8 | 15 | 29 | 16 | 21 |
| 57 | 23 | 8 | 15 | 29 | 16 | 22 |
| 58 | 23 | 8 | 15 | 30 | 16 | 22 |
| 59 | 23 | 8 | 15 | 30 | 16 | 22 |
| 60 | 24 | 9 | 16 | 31 | 17 | 23 |
| 61 | 24 | 9 | 16 | 31 | 17 | 23 |
| 62 | 24 | 9 | 16 | 31 | 17 | 23 |
| 63 | 24 | 9 | 16 | 32 | 17 | 23 |
| 64 | 25 | 9 | 16 | 32 | 17 | 24 |
| 65 | 25 | 9 | 17 | 33 | 18 | 24 |
| 66 | 25 | 9 | 17 | 33 | 18 | 24 |
| 67 | 26 | 9 | 17 | 33 | 18 | 25 |
| 68 | 26 | 9 | 17 | 34 | 18 | 25 |
| 69 | 26 | 9 | 17 | 34 | 18 | 25 |
| 70 | 27 | 10 | 18 | 35 | 19 | 26 |
| 71 | 27 | 10 | 18 | 35 | 19 | 26 |
| 72 | 27 | 10 | 18 | 35 | 19 | 26 |
| 73 | 27 | 10 | 18 | 36 | 19 | 26 |
| 74 | 28 | 10 | 18 | 36 | 19 | 27 |
| 75 | 28 | 10 | 19 | 37 | 20 | 27 |
| 76 | 28 | 10 | 19 | 37 | 20 | 27 |
| 77 | 29 | 10 | 19 | 37 | 20 | 28 |
| 78 | 29 | 10 | 19 | 38 | 20 | 28 |
| 79 | 29 | 10 | 19 | 38 | 20 | 28 |
| 80 | 30 | 11 | 20 | 39 | 21 | 29 |
| 81 | 30 | 11 | 20 | 39 | 21 | 29 |
| 82 | 30 | 11 | 20 | 39 | 21 | 29 |
| 83 | 30 | 11 | 20 | 40 | 21 | 29 |
| 84 | 31 | 11 | 20 | 40 | 21 | 30 |
| 85 | 31 | 11 | 21 | 41 | 22 | 30 |
| 86 | 31 | 11 | 21 | 41 | 22 | 30 |
| 87 | 32 | 11 | 21 | 41 | 22 | 31 |
| 88 | 32 | 11 | 21 | 42 | 22 | 31 |
| 89 | 32 | 11 | 21 | 42 | 22 | 31 |
| 90 | 33 | 12 | 22 | 43 | 23 | 32 |
| 91 | 33 | 12 | 22 | 43 | 23 | 32 |
| 92 | 33 | 12 | 22 | 43 | 23 | 32 |
| 93 | 33 | 12 | 22 | 44 | 23 | 32 |
| 94 | 34 | 12 | 22 | 44 | 23 | 33 |
| 95 | 34 | 12 | 23 | 45 | 24 | 33 |
| 96 | 34 | 12 | 23 | 45 | 24 | 33 |
| 97 | 35 | 12 | 23 | 45 | 24 | 34 |
| 98 | 35 | 12 | 23 | 46 | 24 | 34 |
| 99 | 35 | 12 | 23 | 46 | 24 | 34 |
| 100 | 36 | 13 | 24 | 47 | 25 | 35 |
Physical - AGI
For a Physical build, you'll need to maximize your AGI for better Hit!! counts or else most of your attacks will fumble.
By the endgame, increasing VIT is recommended because Warrior’s endgame gear does not increase it, resulting in his HP sometimes being less than Shinobi’s. Increasing VIT will aid in challenging endgame Quests, especially Ancient Gods.
Increasing STR does not help much in the long run since Warrior's ATK is already high.
Alternatively, you can spread your stats between AGI and PIE to do a "glass cannon" build that deals high damage with both Physical and Holy attacks, in exchange for fragile defenses.
| Contract | Info |
|---|---|
| A baseline contract and Dragon Guard is easy to use; an all-around or support build | |
| Has a long Dragon's Rage time (15 seconds) with a +100% damage boost |
Holy - PIE
For a Holy build, you'll be prioritizing your PIE and maintain a Berserk or Dragon's Rage state at all times to unleash your Dragon Tackle and Dragon Smash attacks. Your Dragon Guard's amount of healing will also increase.
In singleplayer, you might still need some AGI so your normal attacks won't fumble as often or take too much time.
In late-game, if you want to maximize your Dragon Skill damage, you can equip an ![]() Eye Amulet and
Eye Amulet and ![]() Engraved Earrings for bonus Holy damage and raw PIE increases.
Engraved Earrings for bonus Holy damage and raw PIE increases.
| Contract | Info |
|---|---|
| Dragon Tackle can be charged up, which is more devastating when combined with War Cry | |
| Dragon Smash is extremely powerful with a giant overall hitbox and DP is easy to build and maintain | |
| Dragon Skill activation is fast and the Dragon Smash laser deals more damage than the axehead, making it easy to defeat enemies at long range | |
| Increased PIE helps with Dragon Guard healing; an all-around or support build |
Magical - INT
An effective Magical build for Warrior requires ![]() Parashu (up to +3), an Axe with the effect "Deals magical damage".[5] It's mainly used against Named Monsters, such as The Demon's Puppet and The Horn Breaker, who are highly resistant to Physical attacks and must be hit with Magical or Holy attacks instead. You can swing towards PIE for extra damage or VIT for extra HP.
Parashu (up to +3), an Axe with the effect "Deals magical damage".[5] It's mainly used against Named Monsters, such as The Demon's Puppet and The Horn Breaker, who are highly resistant to Physical attacks and must be hit with Magical or Holy attacks instead. You can swing towards PIE for extra damage or VIT for extra HP.
| Contract | Info |
|---|---|
| Better Dragon's Rage results in more opportunities for War Cry |
Teamwork Strategies
Your Role
Dragon Guard is essential to effectively fulfill Warrior's role as a defender and berserker. Accessories with the effect "Resist instant-death" are only available starting from Level 22, so it's helpful to protect your teammates from getting KO'd. Protecting your teammates with Dragon Guard has the bonus of building up Dragon's Rage, so don't worry about your DPS.
Boss Battles
Warrior's role shines when battling against Bosses with a party.
Using Dragon Guard
Many Boss attacks shoot out a string of projectiles that are difficult to dodge. Some Boss attacks may also be difficult to predict. You can support your party by guarding against these attacks. Examples:
- Ogre Prince's fire breath
- Cthulhu's water laser
- Jinryu's lightning dragons
- Lycanthrope's rock throw, rock drill, and bite attacks
- Asura Goblin's spitting fire pillar (you can guard every few seconds while attacking in between)
By guarding, you have the added bonus of building up Dragon's Rage very quickly, which you can use to maximize your attacks between Dragon Guards.
Stunning Bosses Effectively
Stunning Bosses provides a huge advantage to your party because it incapacitates bosses for ~6 seconds, which is a lot of time for you and your team to fight back.
Some Dragon Contracts have an easier time stunning bosses due to having a shorter wind-up time. You should practice predicting the stun timing windows with your given Contract, keeping in mind the wind-up time.
With Dragon Sphere
While the Dragon Sphere is active, you have infinite DP, which you can use to guard your teammates as much as you want. Even though you can dismiss your Dragon Guard to enter Berserk and War Cry, it may be a stronger strategy to guard your teammates and allow them to deal most of the damage to lower the risk of KO's.[h]
If your team is optimized for speedrunning, you can try using War Cry more for huge damage, but guarding periodically still helps. This is especially true if the attacks are hard to dodge or can be quickly blocked before resuming your attacks.
An example of periodically Dragon Guarding before attacking is against the spit fire attack of The Ancient Primal Lord. Normally, once the spit fire attack hits the ground, it will spread in many directions, which can knock back your teammates. You can defend against this by activating the Dragon Guard each time The Ancient Primal Lord spits, which will completely disintegrate its projectiles.
Miscellaneous
The following sections show miscellaneous information and data.
Attack Types & Stats for Abilities
The following is a summary of the Attack Types and relevant stats that affect Warrior's abilities.
| Ability | Affected By |
|---|---|
| Basic Abilities | Physical (STR and AGI) or Magical (INT and LUC) |
| Attack Dragon Skills | Holy (PIE) |
| Dragon Guard Amount of Healing | Warrior's PIE and target's VIT |
Movement Speed
The following table shows Warrior's movement speed compared to Empress.[4]
| Situation | Movement Speed |
|---|---|
| vs. Empress | 100.0% |
| Charging | 92.5% |
Favorite Food
Warrior's favorite foods are:
 Monster Meat (heal 100% HP)
- Cooked Meat S (heal 30% HP)
 Cooked Meat L (heal 50% HP)
Every other character's favorite food heals 15% HP (S) and 25% HP (L).[4]
Gameplay Videos
Gallery
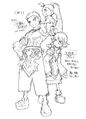
Pre-Dragon Scar Warrior with two orphans.
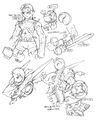
Dragon Scar and armor concepts.
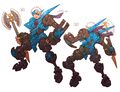
Front and back concepts.

Warrior and his siblings from Animated Trailer Ver B.

Warrior from Animated Trailer Ver B.


Footnotes
- ↑ The Dragon Smash can also stun enemies.
- ↑ This is valid as of Version 3.1.5. Previous versions of the game had War Cry not increase the damage of Dragon Skills.
- ↑ There are some exceptions to this rule. For example, as Wind Warrior, if you keep chaining your grounded Greatsword attacks in rapidly, you can theoretically keep War Cry active indefinitely.
- ↑ The "sweet spot" is referring to the "axehead" or "base" of the Dragon Smash. For Ice Contract specifically, hitting an enemy with the axehead will deal more damage than just hitting with the laser.
- ↑ The laser.
- ↑ The axehead.
- ↑ But his War Cry damage is the highest of all Contracts.
- ↑ The more times a teammate is KO'd, the less XP the party earns upon Quest completion. Keep this in mind when choosing whether or not to guard.
References
- ↑ Inti Creates Official Twitter: https://twitter.com/GunvoltOfficial/status/1084646284227764224 (JP) and https://twitter.com/IntiCreatesEN/status/1088482883625500673 (ENG)
- ↑ 戦士 - Dragon Marked For Death攻略Wiki - atwiki(アットウィキ)- https://w.atwiki.jp/dragonmfd/pages/20.html
- ↑ Adroit Fang's Wind Warrior Infinite War Cry demonstrations: https://twitter.com/Adroit_Fang/status/1659032839667712000 and https://twitter.com/Adroit_Fang/status/1659036405077798912
- ↑ 4.0 4.1 4.2 (3.1.3x) Neka_Mahime_'s Notes 2.0 (Translated by Lancer)
- ↑ DMFD Chinese Wiki Warrior Magical Build